A Wonderful Evening at the 2025 OPS Member’s Exhibition

What a beautiful night at the 2025 Ozark Pastel Society Members’ Exhibition, hosted at ACHE in Fort Smith! The staff did a phenomenal job with every detail—hanging the artwork, arranging delicious hors d’oeuvres and refreshments, setting the mood with music, and welcoming guests with the sparkle of Sissy’s Log Cabin Fine Jewelry.

The exhibition showcases 98 paintings by 26 talented OPS members, and I was honored to have four of my own pieces included.

It was also a wonderful surprise and a true honor to see paintings created during the Rust Workshop I taught for OPS artists now hanging in the exhibition. Watching those works come to life in class and then take their place in the gallery was deeply rewarding.

Throughout the evening, guests enjoyed watching live demos by Diana Harshbarger, Burneta Venosdel, and Susan Hurst, each creating beautiful pastel works while chatting with visitors. The hands-on pastel table, hosted by Jeanette Foreman and Julie Mayser, was a constant hub of creativity and fun. A big congratulations goes to our own Anne Parat, who won the $1,400 jewelry bracket from Sissy’s Log Cabin!

Special recognition also goes to our award winners:

  • People’s Choice Award: Randall Kronblad for On the Way to Evening
  • Julie Mayser’s Painting: Field of Dreams

If you haven’t seen the show yet, there’s still time! The exhibition will be open to the public through November 18 in the West Gallery at ACHE, 1000 Fianna Way, Fort Smith, AR (479-434-4400).

A heartfelt thank you to all the OPS members who worked so hard to make this event such a success.

Lesson Learned: Correcting a Framed Painting

As an artist, there’s nothing quite like the feeling of finishing a painting, framing it, and stepping back to admire your work. But what happens when something about it just doesn’t feel right? That’s exactly what happened to me. I framed a painting I’d spent hours working on, but deep down, I knew something was off. That nagging feeling proved to be right, and it led to a valuable lesson that I want to share with you.

The Framing Dilemma

When I first framed the painting, I knew something wasn’t sitting right. It was a landscape featuring an old, rusted car sitting in a manicured sod field. I had painted everything exactly as I saw it, but there was a disconnect between the car and the rest of the scene. The car felt too separate from the environment—it didn’t belong.

I entered the painting into a juried show, and while I didn’t expect perfection, I was curious about what the judge would say. The feedback was kind but clear: the car, while beautifully rendered, seemed to be floating on the surface of the landscape rather than grounded within it. It almost looked as though the car had been cut out and pasted onto the canvas.

I had focused too much on the details of the car without considering how it interacted with its surroundings. The sod farm was too neat, too perfect, and the car felt like it was sitting on top of the landscape rather than being part of it. I painted what I saw vs taking out my artistic license and painting what felt right.

Unframing the Painting to Make Adjustments

This was the first time I’d ever taken a painting out of its frame to make changes, but I couldn’t shake the feeling that I needed to make it right.

I decided to add texture and life to the landscape. I introduced some rougher, wilder grasses into the scene. I imagined what the field would actually look like after a car had been sitting there for an extended period. Grass would have grown up around it, and weeds would have started to take over. It was exactly what the painting needed.

The Lesson Learned

The biggest lesson I learned from this experience is simple but powerful: trust your gut. If something doesn’t feel right about a painting, don’t rush to frame it or call it finished. That unsettled feeling is often your intuition telling you that there’s more work to be done.

I also realized how important it is to step away from your work. Let the painting sit for a while, maybe even turn it around so you don’t look at it for a few days. Take a photo of it or examine the reflection in a mirror. These tricks can help you see the composition with fresh eyes. And if you’re still unsure, call a friend or fellow artist for feedback.

Conclusion

Correcting a painting that was already framed felt like a major step outside my comfort zone, but it led to a deeper understanding of the creative process. As artists, we’re always learning, even from the mistakes we make. This experience taught me to trust myself, take a step back, and give my art the time it needs to fully evolve.

Have you ever had a similar experience where you needed to correct a piece of artwork after thinking it was finished? I’d love to hear your stories and lessons learned in the comments below.

How fantastic it is when art beautifies spaces and supports such meaningful causes.

My daughter, Evelyn Laurence, and I had a wonderful time at the Community Service, Inc. 13th Annual Steve Willbanks Tribute. CSI’s mission to lead in providing quality services to youth and families—empowering them to succeed in their homes, schools, careers, and communities—is truly inspiring.

The event featured a silent auction, and it was an honor to have “Mater” included. How fantastic it is when art beautifies spaces and supports such meaningful causes!

Thank you to Ray Moll for inviting us to be your guests. And congratulations to Shawn Halbrook on your well-deserved community service award!

The Rusty Vehicle Process: Exploring New Supplies: Enhancing My Artistic Process After the IAPS Convention

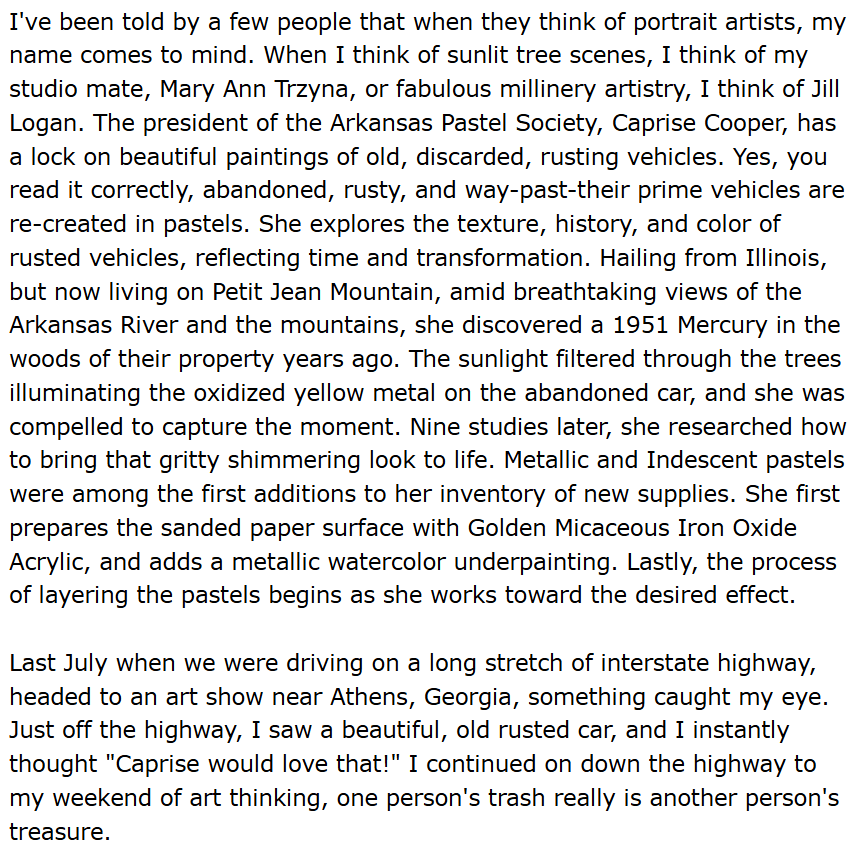
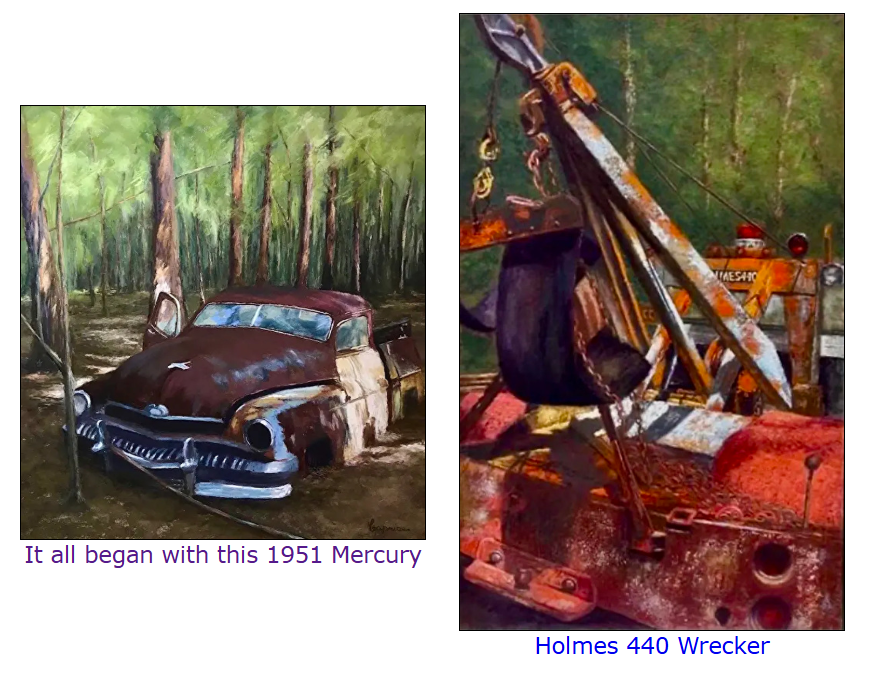
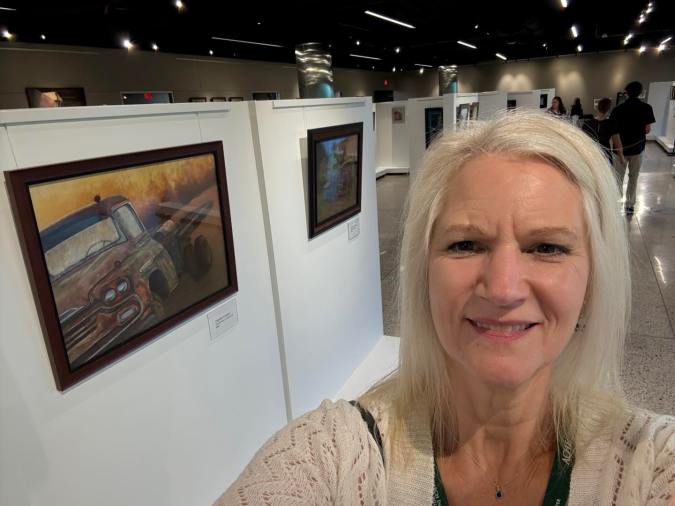
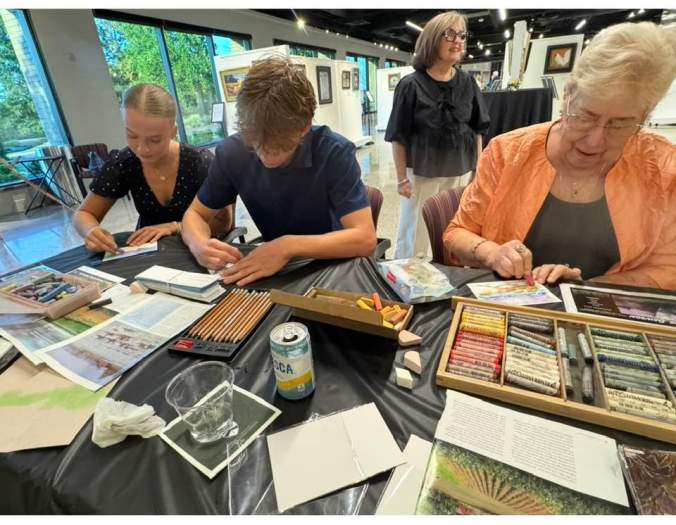
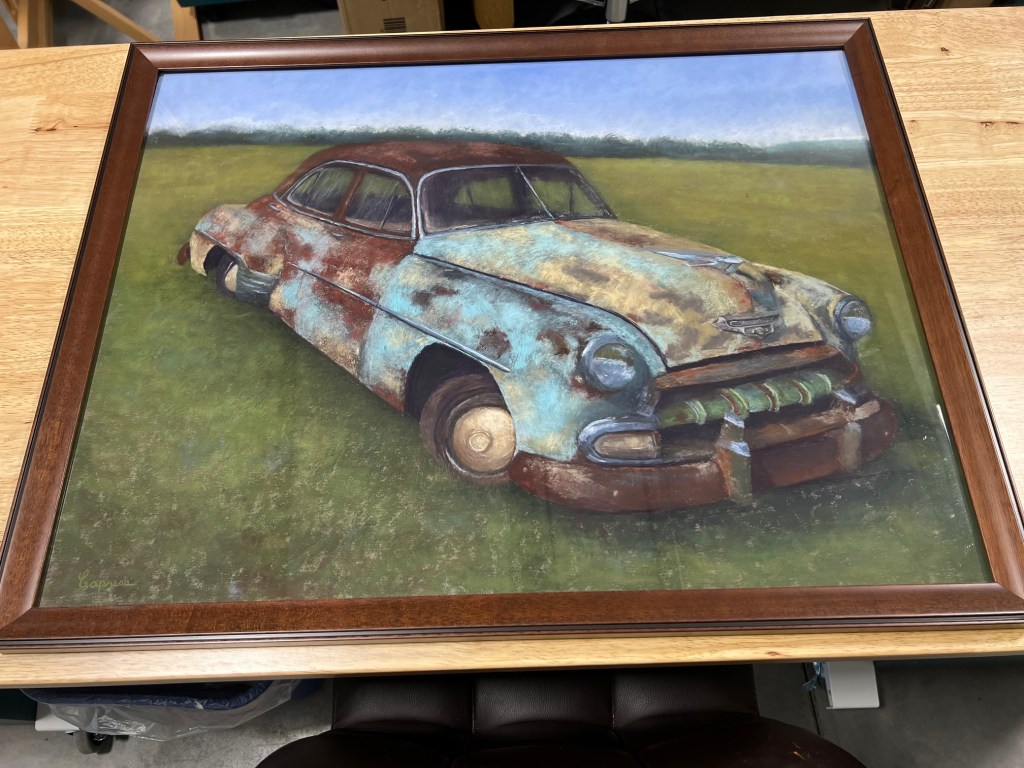
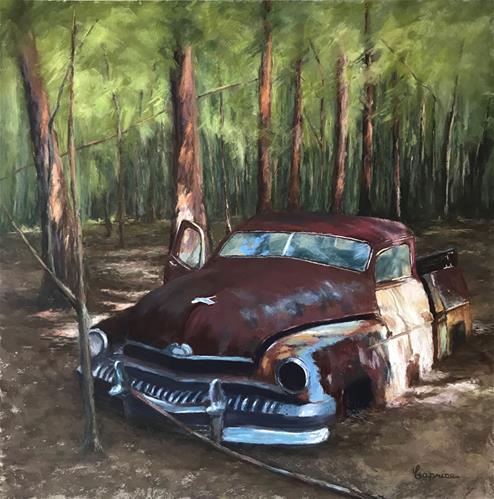
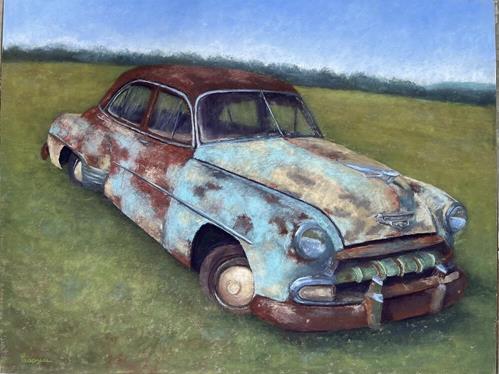
Attending the IAPS (International Association of Pastel Societies) Convention this past June was an inspiring experience. The convention buzzed with creativity and innovation, offering a unique opportunity to explore new techniques and materials. Among the various workshops and demonstrations, the vendor booths were particularly exciting. I couldn’t resist purchasing several supplies I had never used before. This blog post details my journey of incorporating these new tools into my artistic process, highlighting the challenges, benefits, and overall impact on my work.

The New Supplies

At the IAPS Convention, I acquired several intriguing supplies that piqued my interest:

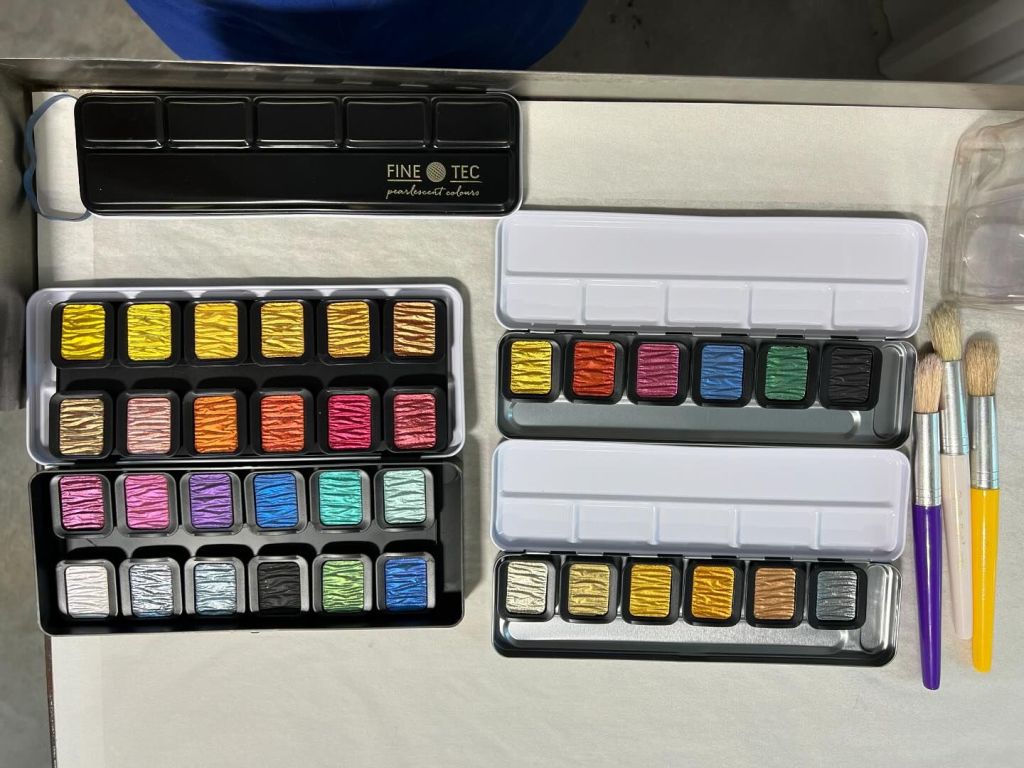
  1. Royal Talens FINETEC Premium Metallic Watercolors
    • These watercolors add a shimmering effect and enhance the luminosity of the underpainting. They have brilliant colors and strong pigmentation.
  2. Terry Ludwig Elements Pastels
    • Known for their rich, creamy texture and metallic flakes, these pastels offer vibrant and unique highlights.

My Process

Incorporating these new supplies into my artistic process was both exciting!

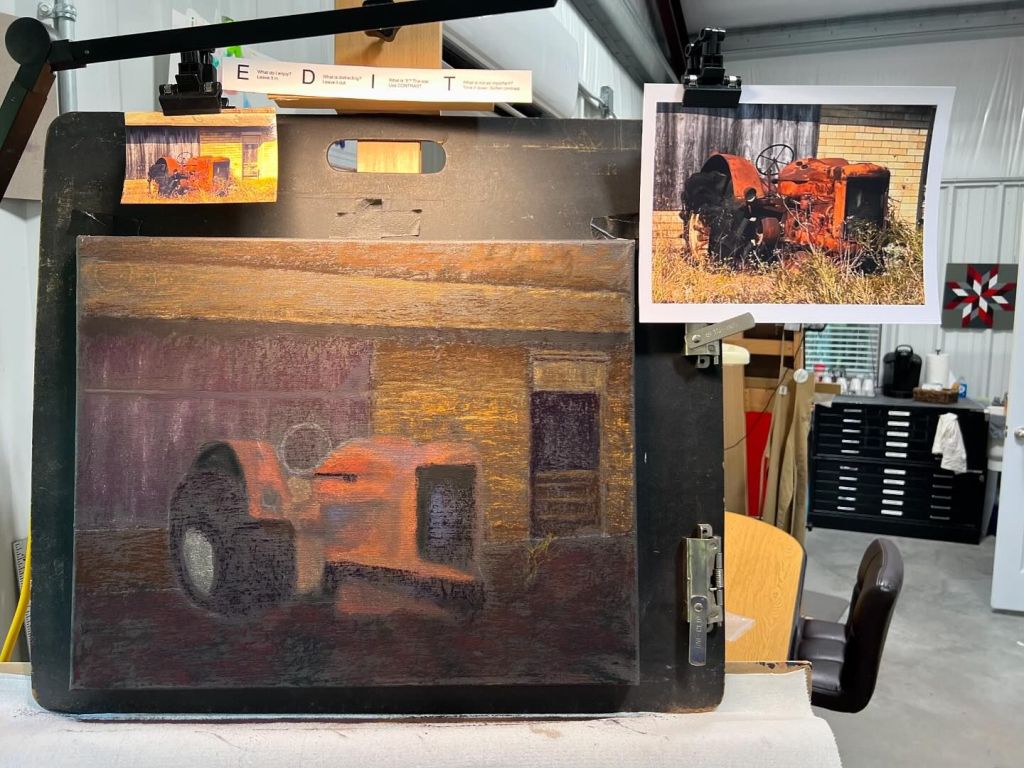
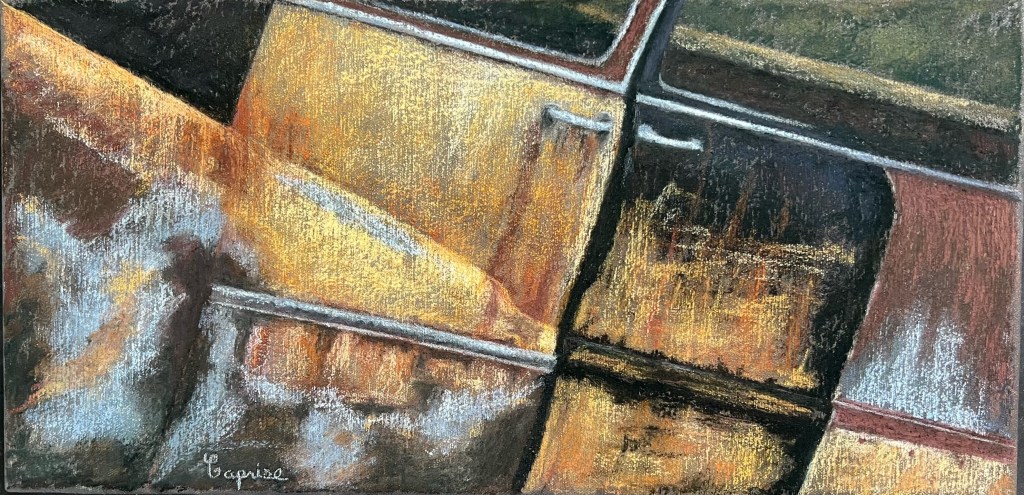
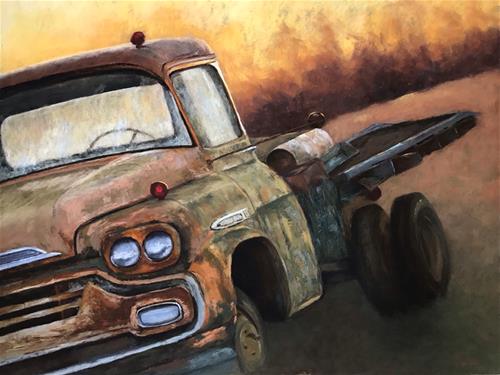
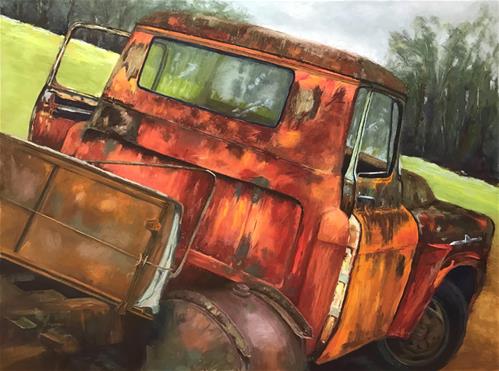
Switching from Sanded Paper to Stretched Canvas

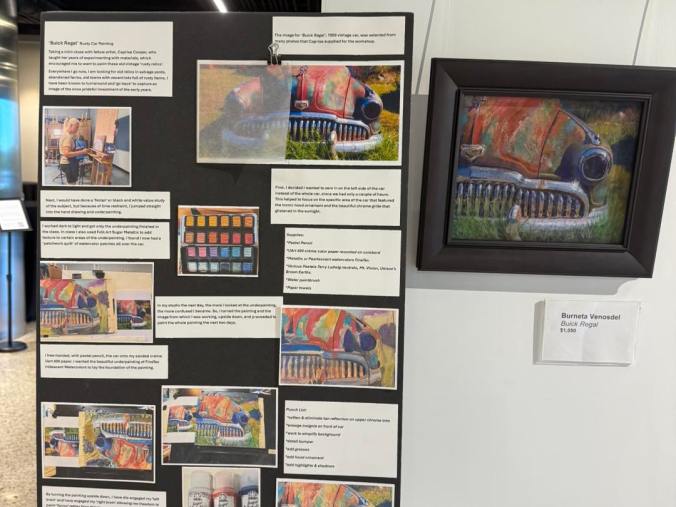
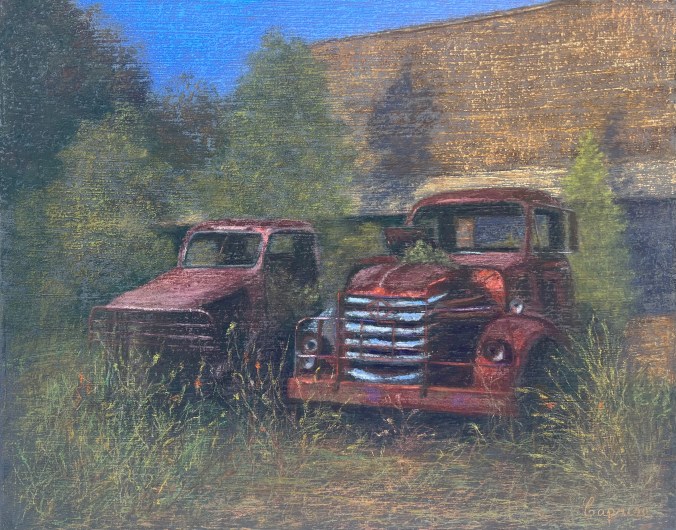
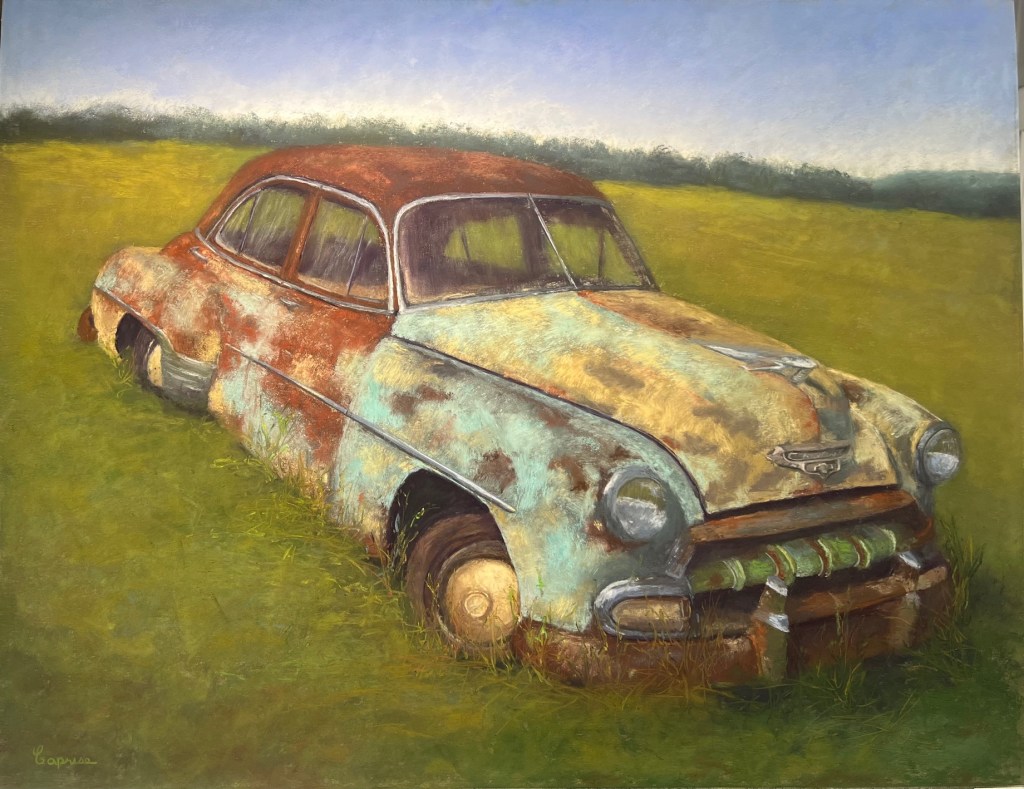
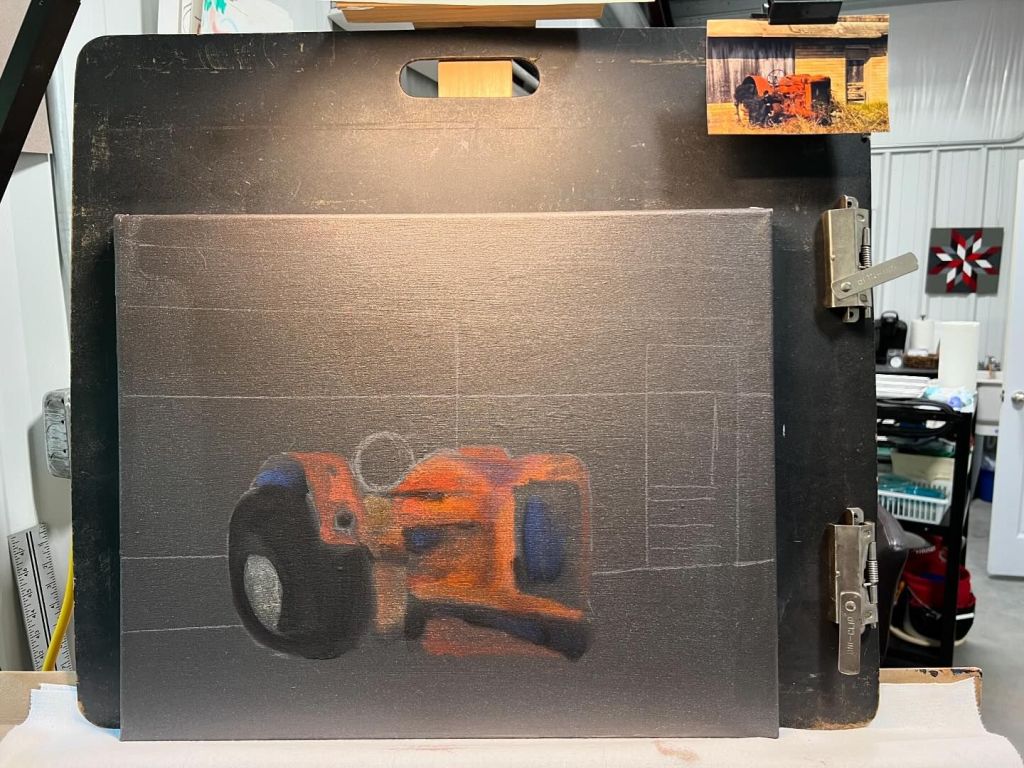
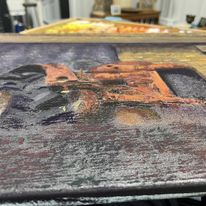
For this particular painting, I decided to use a stretched canvas instead of my usual sanded pastel paper. The transition started with applying gesso over an old painting, using a 6″ wide brush to create a textured surface. To avoid working on a stark white canvas, I covered it with micaceous oxide acrylic paint. This resulted in a gritty, dark gray surface with a subtle shimmer, perfect for painting rusty vehicles. A technique I learned about at Art Outfiters in Little Rock, AR.

Sketching and Underpainting

Once the canvas was prepared, I sketched out the drawing. I then used the Royal Talens Premier Metallic watercolors for an underpainting on the tractor. These metallic watercolors added a luminous base layer that would shine through the subsequent pastel layers.

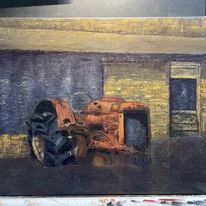
Layering and Detailing with Pastels

With the underpainting complete, I began layering pastels. I started by blocking in the entire painting, ensuring I identified the darkest darks, lightest lights, and mid-tones. Working around the painting, I applied pastels with directional strokes to create texture and depth. Using a light touch with the pastels allowed the underpainting to shine through, creating a layered and nuanced effect. This technique also preserved the tooth of the canvas, enabling multiple layers of pastel to be added without overloading the surface. It was a challenge to resist focusing on all the intricate details at this stage.

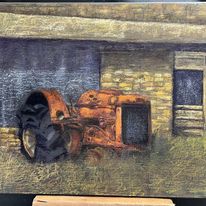
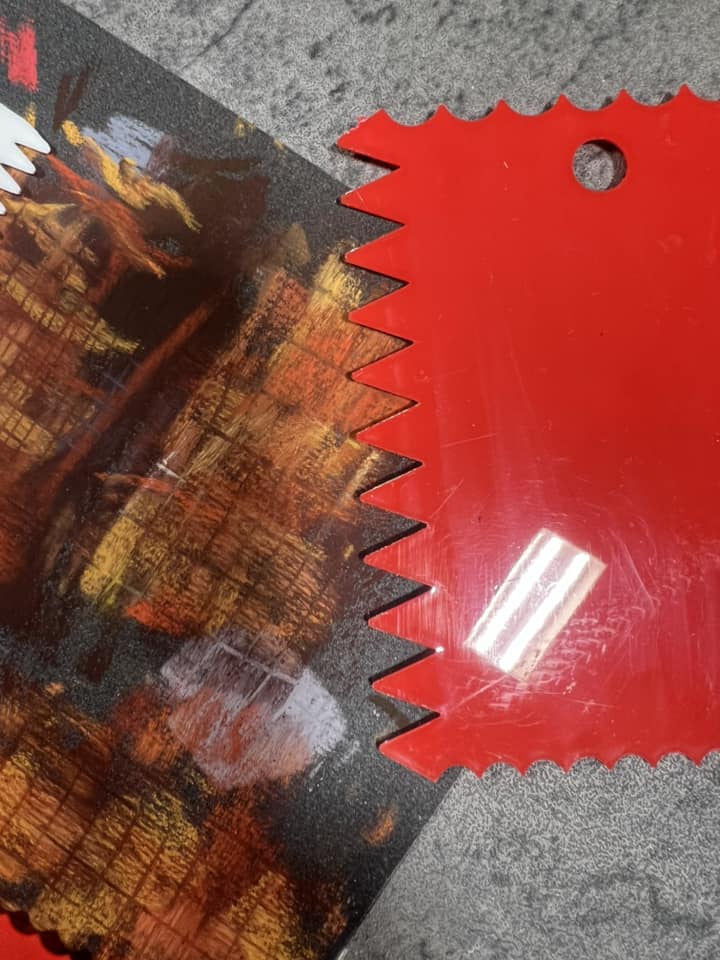
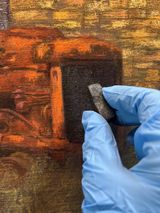
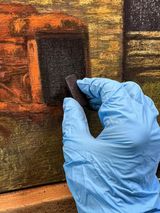
For the brick building, I wanted to convey the texture of bricks without drawing each one individually. I used cake decorating tools to drag across the pastel, creating lines that suggested bricks. I then lightly blended certain areas to soften and eliminate some of the lines, achieving a balanced effect.

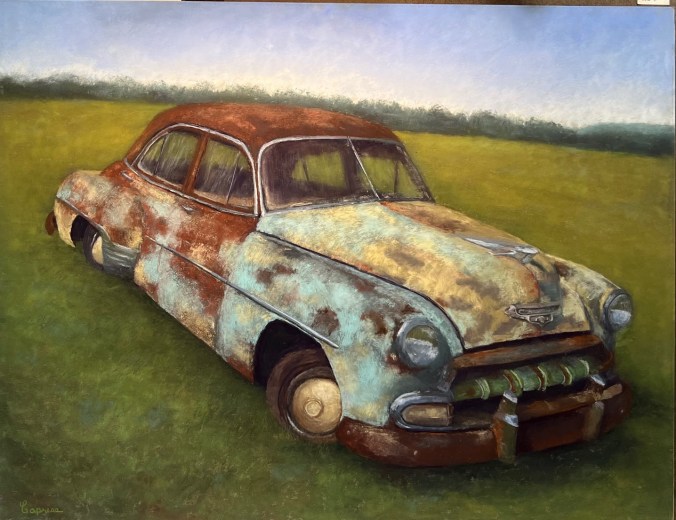
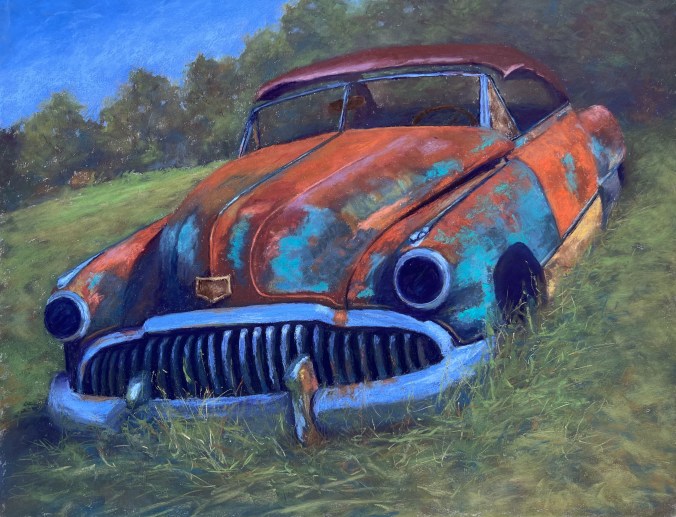
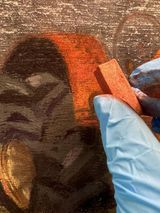
Next, I turned to the details of the tractor. My goal was not to capture every detail perfectly but to provide enough information for the viewer to recognize it as a tractor. Before finalizing the lighting, I added the grasses, adjusting the balance between light and dark areas to enhance the overall composition.

Adding Finishing Touches

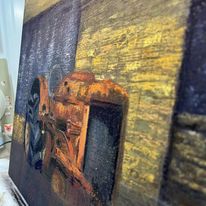
The most fun part was using the Terry Ludwig Iridescent pastels. These pastels are incredibly rich and creamy, with a beautiful metallic flake that was perfect for highlighting the radiator of the tractor and adding orange highlights of rust. These finishing touches brought a dynamic and eye-catching quality to the painting.

Benefits and Enhancements

The Royal Talens Premier Metallic watercolors added a unique luminous quality to the underpainting, enriching the final work’s depth and vibrancy. Finally, the Terry Ludwig Iridescent pastels offered stunning highlights and metallic effects that elevated the painting’s visual appeal.

These new materials have expanded my creative possibilities, allowing me to experiment with different textures and finishes. The process of integrating these supplies also challenged me to think differently about my approach, leading to a more dynamic and layered final piece.

I encourage fellow artists, whether beginners or professionals, to step out of their comfort zones and experiment with new materials. Stay tuned for the final version of this painting and more insights on how these supplies continue to shape my art.

So Many Firsts Lead to a New Process

Since May I’ve been focused on “firsts”, said another way, trying new things. Karen Margulis, an artist that I follow and have taken her workshop says, “if you ask yourself what if, then try it.” It’s during these moments of curiosity and experimentation that I discovered a unique approach to develop my rusty vehicles. Here is my list of firsts:

  • Hosting a Plein Air Painting Event on Petit Jean Mountain, AR and a tour of my studio with the Arkansas Pastel Society.
  • Coordinating the first Arkansas Pastel and Ozark Pastel Society Member Show at Thea Foundation.
  • I created a pastel painting on Black Uart Sanded paper. I’ve never used black before.
  • I took a ride in the 1931 CORD L-29 Cabriolet of which my daughter and I painted a mural of at the Museum of Automobiles on Petit Jean Mountain, AR.
  • I framed paintings using the passee-partout process (placing the pastel painting directly on the glass).
  • I created a painting with pastel on black canvas.
  • I’m on YouTube providing an artist’s critique.
  • Using the edge of my palm to knit together the color of the sky vs lightly using my fingers. This knitted the colors together nicely in a large area.
  • Switching from ruled paper notebook to a drawing journal to keep notes on my entire process, swatches of the pastel I used, and sketches.
  • Taking an introduction to calligraphy (I have horrible handwriting).
  • Using Golden Fluid Acrylic – Micaceous Oxide to cover a white canvas.
  • Using iridescent watercolors for an underpainting.

It is the combination of a canvas, micaceous oxide, iridescent watercolor underpainting, and pastels that allowed me to create a new approach to my rusty vehicle series. The micaceous oxide created a metallic sheen, mimicked the reflective qualities of rust and metal surfaces. The iridescent watercolor underpainting created a shimmering effect that added a unique visual dimension. The contrast between the iridescence and the rust textures produced an interplay of light and shadow.

How did the Rusty Vehicle series get started?

A few years ago, we purchased some additional property that connected to ours. As we hiked the property, we stumbled across two rusty vehicles. A 1951 Mercury Coupe that had been altered with a Chevrolet truck bed and a 1970 Rambler. The Mercury was nestled in the woods with the sunlight filtering through the trees, across the ground, and up the side of the car. I was fascinated by the light, chrome, and rusty colors. Not to mention, I love old cars. I thought to myself, I need to try and paint that. Where do I begin, I’ve never painted a vehicle before. I had to remind myself of the basics of drawing, don’t think of it as a car, but rather shapes, values, and color.

I absolutely fell in love with creating the textures and rich multi-colors of rust and chrome. Now don’t get me wrong, I certainly faced some challenges, like I painted the glass three times before I got it right. I had so much fun, that I’ve been working on a series of rusty vehicles ever since.

A few of the pieces are still available for purchase through my on-line gallery.